Tutorial/Anleitung Capacity Display 8V – 48V
Deutsche Anleitung (English tutorial below!)
Merkmale
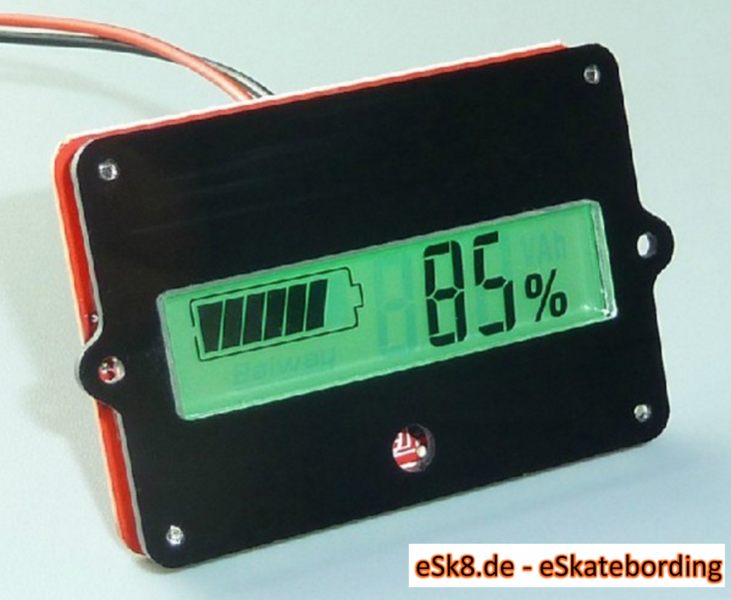
- Produkt: Akku Kapazitätsanzeige
- Unterstützte Akkus: Blei und Lithium Akkus
- Eingangsspannung: 8-48V
- Eingangsstrom: 5-10mA
- Stromverbrauch: 200-700mW
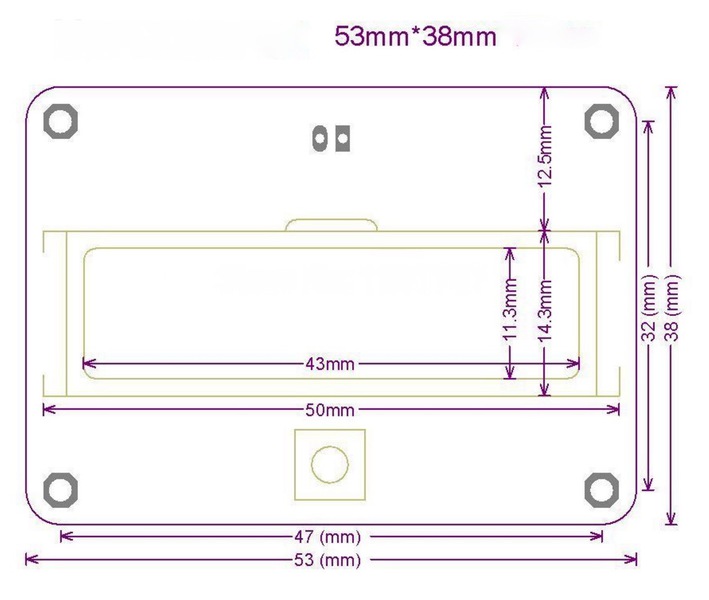
- Abmessungen: 53mm*38mm (Platine), Höhe 5mm
- Befestigungsabmessung: 47mm * 32 mm
- Anschluss: Pluspol (+) = rot, Minuspol (-) = schwarz
Bedienungsanleitung
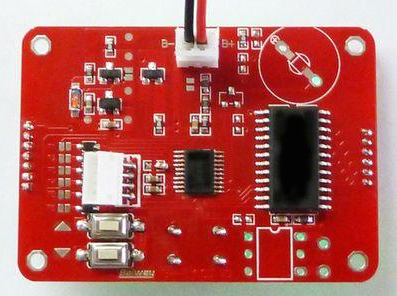
Die beiden weißen Knöpfe auf der Rückseite (Pfeiltaster Kup ↑ und Kdn ↓) werden dazu verwendet, die richtigen Werte für Spannung und Akku-Typ einzustellen.
Einstellungen:
- Anzeige von der Stromversorgung trennen
- Pfeiltaste Kdn ↓ gedrückt halten, bis die Einstellungsanzeige erscheint, dann loslassen
- Es erscheint nun die Anzeige „PB x“ oder „LI x“, wobei das „x“ die Anzahl der Zellen angibt
- Nun wird mit den Pfeiltasten der richtige Akku-Typ und Spannungswert ausgewählt - die Zahl hinter dem Akku-Typ gibt immer die Anzahl der Zellen an
Übersicht der angezeigten Werte:
Pb1: 12V Blei Akku
Pb2: 24V Blei Akku
Pb3: 36V Blei Akku
Pb4: 48V Blei Akku
Li2: 2s Lithium Akku
Li3: 3s Lithium Akku
Li4: 4s Lithium Akku
Li5: 5s Lithium Akku
Li6: 6s Lithium Akku
Li7: 7s Lithium Akku
Li8: 8s Lithium Akku
Li9: 9s Lithium Akku
LiA: 10s Lithium Akku
Lib: 11s Lithium Akku
LiC: 12s Lithium Akku
- Nach der Einstellung des richtigen Werts schaltet sich das Einstellungsmenu automatisch aus.
Tutorial in English:
- Product: battery capacity indicator/tester
- Supported batteries: lithium batteries
- Input voltage: 8-48V
- Input current: 5-10mA
- Input power consumption: 200-700mW
- Dimensions: 53mm*38mm(PCB) (LCD to PCB surface height: 5.0 mm; PCB on the back of the highest height: 5.0 mm)
- Installation method: 47 * 32 mm spacing of PCB screw fixation
- Lead: plus or minus via red/black cables to connect to the battery
Setup Instructions:
- Operation keys: the two white buttons on the back of the indicator are "Kup ↑" and "Kdn ↓",they are used to select parameters.
- Selection of the Batteries:
- Power off the display
- Hold the "Kdn" button
- Power on the display
- Release the "Kdn" button, a screen will now display the symbols "Pbx" or "Lix" , while x is the number of cells -> please choose only the "Lix" values displayed below:
Pb1: 12V Lead/Acid
Pb2: 24V Lead/Acid
Pb3: 36V Lead/Acid
Pb4: 48V Lead/Acid
Li2: 2s Lithium
Li3: 3s Lithium
Li4: 4s Lithium
Li5: 5s Lithium
Li6: 6s Lithium
Li7: 7s Lithium
Li8: 8s Lithium
Li9: 9s Lithium
LiA: 10s Lithium
Lib: 11s Lithium
LiC: 12s Lithium
After setup the device should switch off automatically.